⭐ Premium
When you first activate Church Admin Premium, you’ll see a Quick Start button at the very top of the Church Admin main screen in your WordPress dashboard. Click it before you do anything else — it checks seven essential areas of your setup and gives you a clear, colour-coded status for each one. Green ticks mean you’re good to go; red alerts mean something still needs attention.
You can return to this page at any time — it always reflects the current state of your setup, making it a useful diagnostic tool even after initial configuration is complete.
Step 1: Check emails send okay from the website
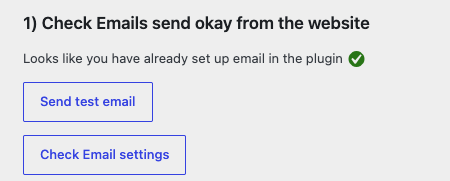
Email is at the heart of Church Admin Premium — registration confirmations, password reminders, rota notifications, and bulk announcements all depend on it. The Quick Start page checks whether your website can send emails and reports one of three situations:
Email is working
You’ll see a green tick and two buttons — one to send a test email to yourself, and one to review your email settings. It’s worth sending that test email to confirm everything is reaching inboxes correctly.
Email is available but not yet configured
The Quick Start page will automatically set the method to “native” (using the server’s built-in mail function) and confirm with a green tick. Use the test email button to verify — native sending sometimes works in principle but emails end up in spam or are silently dropped.
Email sending is disabled
Some web hosts — particularly budget shared hosting — disable server-level email entirely. If so, you’ll see a red alert with three options for resolving it:
- Add SMTP settings for your own email address (Gmail, Outlook, or your church’s email provider)
- Use Brevo (free up to 300 emails per day)
- Use Mailersend (free up to 3,000 emails per month)
See Update email settings and Help, I’m not getting emails from the plugin for more detail.
Step 2: Set up the address list
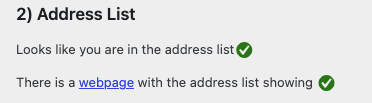
The address list — the directory of people and households — is the foundation everything else builds on. Rotas, attendance, giving, small groups, and communications all connect back to people records, so getting people into the directory is the most important early task.
The Quick Start page links you to three ways to populate it:
- Add households manually — go to Church Admin → People → Add household — see Adding and editing a household
- Import a CSV — if you have existing data in a spreadsheet — see Import address list CSV
- Let people self-register — add a registration form to your website so people add themselves — see Address list registration
Step 3: Import Address List
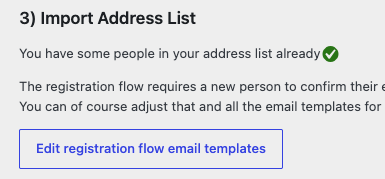
If your address list is empty, you will begiven the chance to imort a CSV — see Import address list CSV.
You will aslo have a button link to setting up the registration email templates.
Step 4: Set up services
Services are the recurring gatherings your church holds — Sunday morning, Wednesday evening, and so on. Setting them up is essential for attendance tracking, the rota, and service prebooking. You need at least one service before you can use any of those features.
Go to Church Admin → Sites & Services to add your services. If you run multiple sites, set those up first under Sites, then add a service for each gathering at each site. See Service schedule for guidance.
Step 5: Set up the rota / schedule
The rota lets you schedule volunteers across your services — sound desk, welcome team, children’s workers, and any other role you need to fill each week. The Quick Start page checks whether you have schedule jobs defined and a rota in place.
The setup order matters here:
- Make sure your people are in the directory (Step 2)
- Make sure your services are set up (Step 3)
- Add schedule jobs — the roles that need filling — at Church Admin → Schedule → Add a schedule job
- Build the rota at Church Admin → Schedule
See Rota / Schedule for a full walkthrough.
Step 6: Show the address list on your website
Church Admin can display a members-only directory on your website, letting logged-in members look up contact details for others in the congregation. The Quick Start page checks whether you have a page set up with the address list shortcode or block.
Create a page and add the shortcode:
[church_admin type="address_list"]Or search for the Church Admin block in the Gutenberg inserter and select Address List. Make sure the page requires a login to view — you don’t want personal details publicly accessible. See Showing Church Admin elements on your website and Members only content.
Step 7: Set up a sermons page
The Quick Start page checks whether you have a page on your website displaying your sermon archive. This is the public-facing page where visitors and members can listen to or watch past messages.
Create a page and add the shortcode:
[church_admin type="sermons"]Or use the Sermons block in the Gutenberg inserter. Once the page is in place you can start adding sermons at Church Admin → Media. See Podcasting if you want to also publish a podcast feed.
Step 8: Google Maps integration
Google Maps is used in several places — the people map, small groups map, and geolocating household addresses. Without an API key these features won’t work.
If you haven’t set one up yet, the Quick Start page flags this and provides a text field where you can paste the key directly. Once saved, a small static map confirms the key is working. If the map area appears blank, right-click inside it and open the image in a new tab — any error from Google will appear there, usually indicating that billing hasn’t been enabled on the Google Cloud account or the key’s permissions aren’t set up correctly.
See Google API key setup for a full walkthrough.
The manual
At the bottom of the Quick Start page you’ll find a link to download the full Church Admin Plugin manual as a PDF. It covers every feature in detail and is worth keeping to hand, particularly in the first weeks when you’re still finding your way around.
What comes next?
Once all seven items are showing green you have the core of Church Admin Premium up and running. From there you can explore at your own pace — small groups and classes, giving forms, communication tools, key dates, or the Our Church smartphone app.
The full library of tutorials is available at churchadminplugin.com/tutorials.