⭐ Premium
If you’re moving to Church Admin from a spreadsheet or another system, importing a CSV is the fastest way to get your congregation into the directory. Rather than adding households one by one, you can bring everyone in at once.
Step 1 — Prepare your spreadsheet
Your data needs to be in a CSV file with column headers in the first row. The easiest starting point is to download the official template and fill it in with your data:

Rules for your CSV
- One person per row — if a husband and wife are both in the directory, they need two separate rows
- Households are grouped by address — the plugin automatically puts people with the same address into the same household, so you don’t need to do anything special for families
- Address columns — the address can be in a single column or spread across up to five separate columns (street, town, county, postcode, country)
- Custom columns — you can include up to five custom data columns beyond the standard fields
- First row must be headers — don’t include a title row above the headers; the first row should be the column names only
Tips for preparing your data
- Make sure addresses are consistent — if two family members have slightly different spellings of the same address they will be imported as separate households rather than one
- You can leave columns blank if you don’t have that data — the import will skip empty fields
- Don’t worry about getting everything perfect first time — you can edit individual records after import
- When your spreadsheet is ready, save or export it as a
.csvfile from Excel, Google Sheets, or whichever programme you are using
Step 2 — Open the import tool
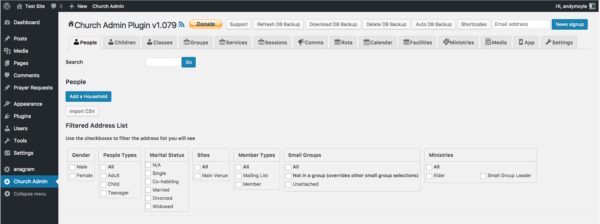
In your WordPress dashboard go to Church Admin → People → Import CSV.

Step 3 — Upload your file

Choose your CSV file and decide whether to tick Overwrite current address details?
- Leave unticked for a first import, or when adding new people who aren’t already in the directory
- Tick it if you are re-importing to update existing records — for example after correcting addresses in your spreadsheet. This will overwrite what is currently stored for matching records.
Click Upload to proceed.
Step 4 — Map your columns
The next screen shows your column headers alongside a dropdown for each one, letting you tell Church Admin what each column contains. A few rows of your actual data are shown to help you match things up correctly.

Match each of your columns to the corresponding Church Admin field. If you have a column that doesn’t correspond to any field — or data you don’t want to import — set it to Unused and it will be ignored.
Click Save when you’re done. The import will run and your people will appear in the directory.
After the import
- Check for duplicates — if addresses weren’t consistent in your spreadsheet, some people may have been imported as separate households when they should be one. Use Church Admin → People → Check duplicates to find and merge them.
- Check for directory issues — go to Church Admin → People → Check for directory issues to find any records with missing required fields.
- Geocode addresses — if you want people to appear on the people map, run Church Admin → People → Bulk geocode to add map coordinates to all imported addresses at once.
- Create user accounts — imported people don’t automatically get WordPress login accounts. See Creating user accounts for your options.