⭐ Premium
The Our Church App is included with Church Admin Premium — there’s nothing extra to purchase or install. Once Premium is activated on your site, the app is available immediately. This page walks through the four steps to get it set up and in the hands of your congregation.
How members install the app
Members install the app by visiting ourchurchapp.online on their phone. The site detects their device and redirects to the correct app store — iOS or Android — automatically. Once installed, they log in with the WordPress account credentials you have created for them. See Creating user accounts.
Step 1 — Configure app settings
Go to Church Admin → App → App settings. The app module on the main Church Admin dashboard shows a dropdown for all app-related screens.


The settings available are:
- SMS Replies — if you have Twilio configured, add people from the directory who will handle inbound SMS replies. They need a directory entry, a WordPress account linked to it, and the app installed. Once added and saved, they see the SMS Replies item in their app menu.
- Disable app registrations — by default, people can register themselves via the app. Tick this to disable self-registration through the app if you prefer to manage all accounts manually.
- Address list style — choose whether the directory appears as an alphabetical list of individuals or grouped by household. The individual option gives admins edit functionality when viewing the address list in the app.
- App menu title — the text shown at the top of the app. Defaults to your site URL if not set — change it to your church name.
- App menu CSS — add custom CSS to style the app menu to match your church’s branding.
- Stop push notifications for new posts — by default, publishing a new WordPress post sends a push notification to app users who have opted in. Tick this to disable that behaviour.
Click Save when done.
Step 2 — Set who appears on the address list
The app address list always respects individual privacy settings — by default, people are not shown unless they have opted in or an admin has set them to visible.
In the App settings screen there is a set of member type checkboxes controlling which member types appear in the app directory. If all member types are unchecked, the address list will not appear in the app menu at all — make sure at least one is ticked if you want members to find each other in the app.

Step 3 — Set up the app menu
Go to Church Admin → App → App menu. On first run the menu has very little in it — click Reset app menu to default to populate it with the standard set of menu items.


Two items — Home and Account — are always available and cannot be removed. For all other items you can:
- Show / hide — tick the Show checkbox to include an item in the menu, untick to hide it
- Restrict to logged-in users — tick Only logged in user sees item in app menu to hide the item from people who haven’t logged in. If you leave this unticked for something like Address, non-logged-in users can navigate to the page but will be asked to log in before seeing any data.
- Reorder — drag and drop items into the order you want them to appear
Step 4 — Add or edit app pages
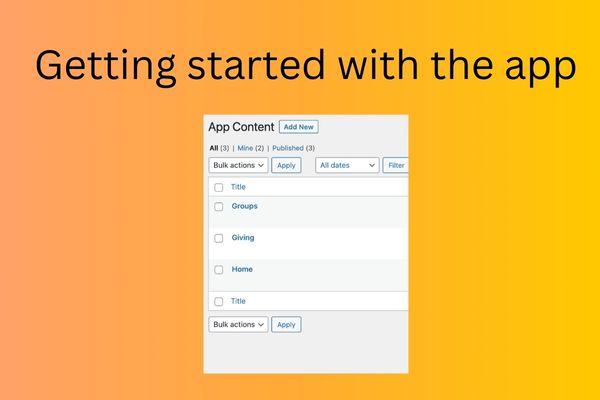
In your WordPress dashboard, go to App Content in the left-hand menu. This works just like the WordPress Pages or Posts screens. Add pages using the Classic Editor — these pages appear as content in the app.

For more detail on customising the app with markup and links, see Using the app setup plugin and App markup.
What the app can do
Once set up, the Our Church app gives your congregation access to:
- The member directory
- Their personal rota schedule and non-availability
- Ministry Chat rooms
- Sermons and podcast
- Prayer requests
- Calendar and events
- Giving
- Acts of courage
- Churchwide prayer
- Volunteer sign-up
- Push notifications
- Individual attendance recording
Related tutorials
- Creating user accounts
- App menu
- App settings
- App users
- Send push message
- Ministry Chat